Brief runs an MCP server so the AI assistant you already use can reach your Brief context directly. MCP, the Model Context Protocol, is an open standard that lets an assistant such as ChatGPT or Claude connect to an outside system and call it mid-conversation. You connect Brief once, and from then on the assistant can pull from it whenever you ask.
The Brief MCP server exposes what Brief already maintains for you: your daily briefing, meeting and person briefings, your commitments and tasks, your contacts, and search across everything you have connected. Ask "what should I work on first" in Claude or ChatGPT and the answer comes back grounded in your own work rather than in a general guess.
Two things hold for every client. The server URL is always https://app.trybrief.ai/mcp, and sign-in is OAuth against your existing Brief account. You approve the connection once, and the assistant reaches only your own data, under the same isolation and encryption described in Privacy and security.
MCP in ChatGPT Web app
ChatGPT configures a custom MCP server differently in the web app than in the desktop app. Follow these steps closely in the web app:
- Click your name in the bottom left corner.
- Select Settings → Plugins → Developer Mode.
- Turn on the Developer mode toggle.
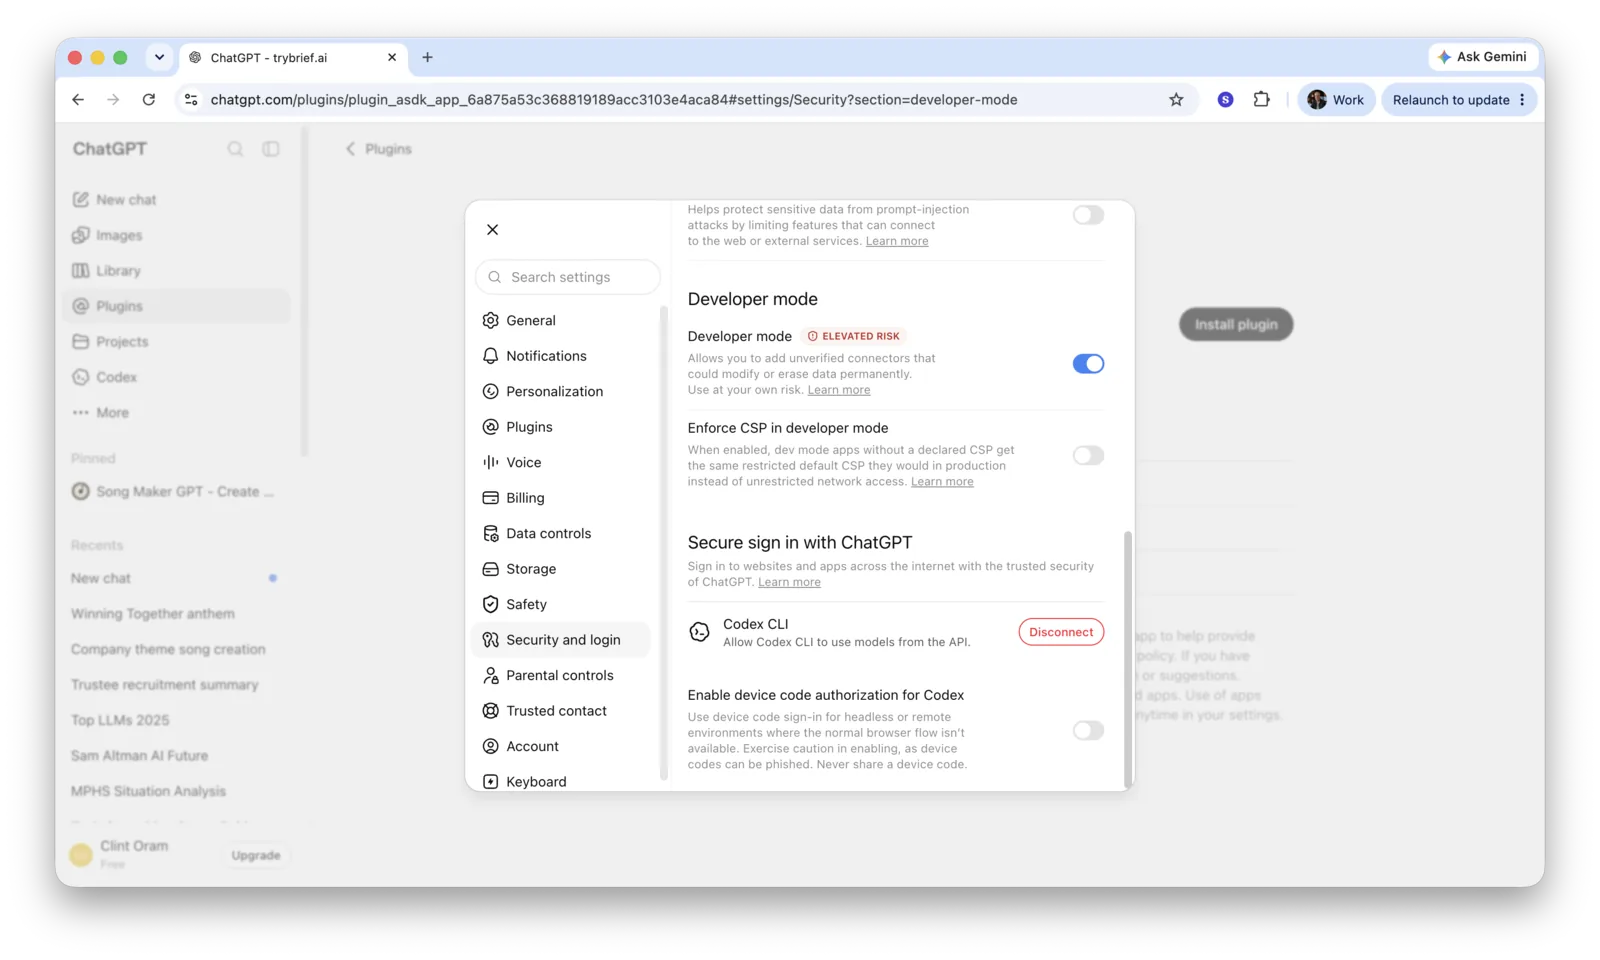
Set Developer mode in the System Settings → Plugins → Developer mode screen in the ChatGPT Web app. - Navigate back to Plugins → Browse Plugins in Settings. A screen entitled Plugins opens.
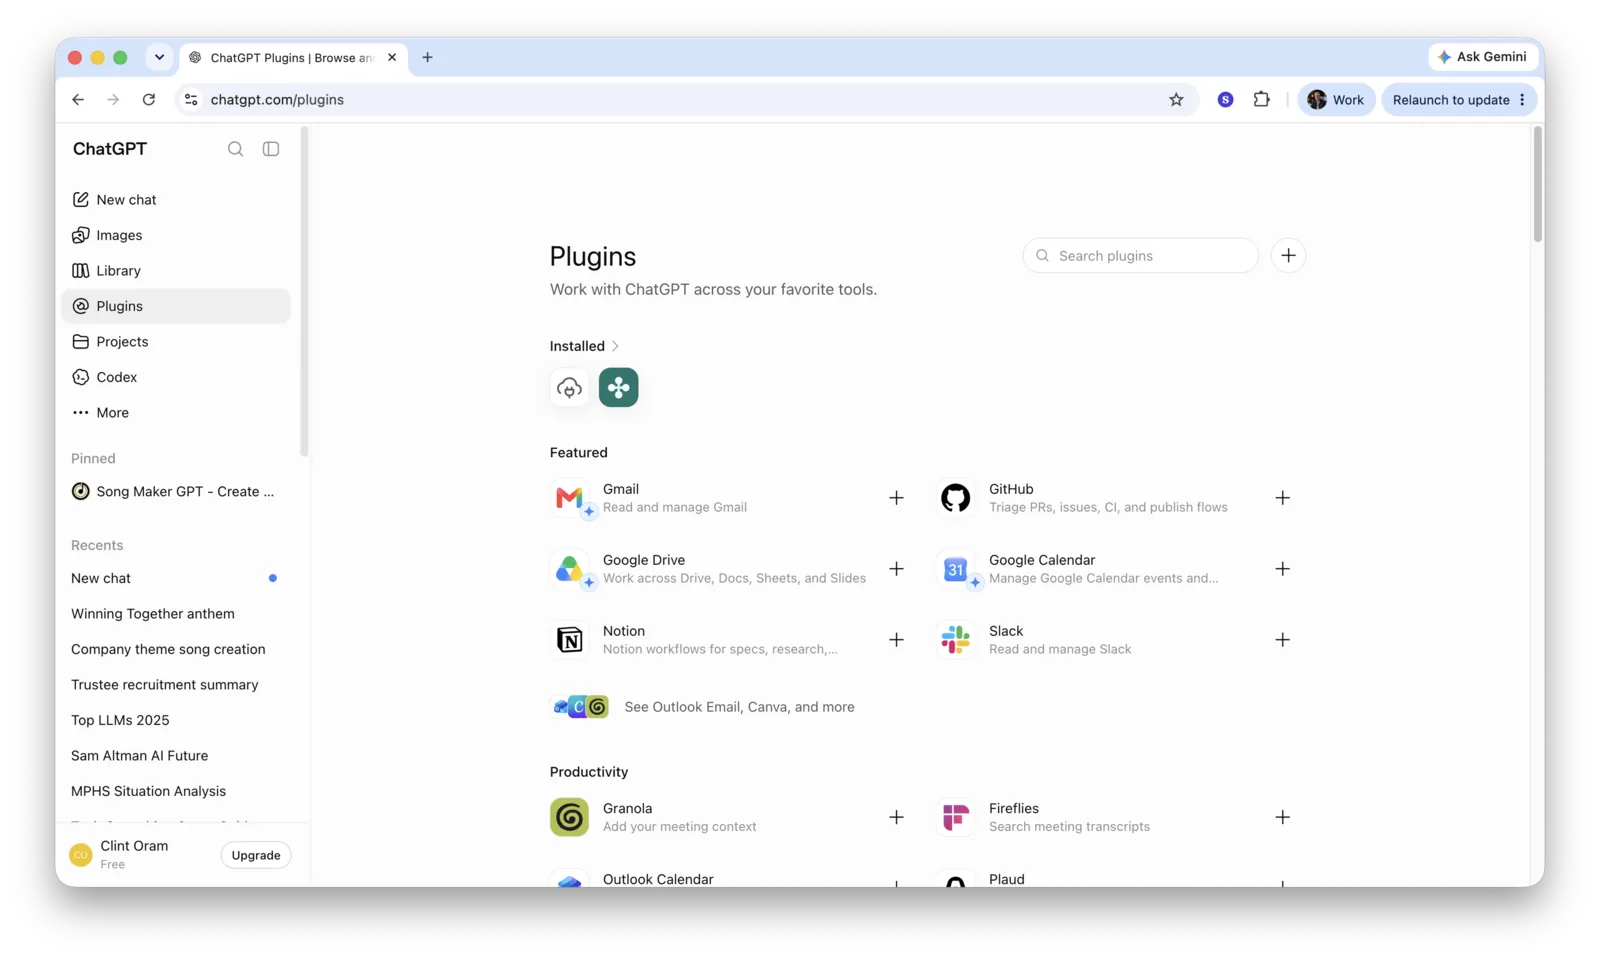
The System Settings → Plugins → Browse plugins configuration screen in the ChatGPT Web app. - In the upper right, click the large plus icon. A popup entitled New Plugin opens.
- In the Name field, enter trybrief.ai.
- In the Connection field, enter https://app.trybrief.ai/mcp.
- Leave the Authentication dropdown set to OAuth.
- Check the box labeled "I understand and want to continue."
- In the bottom right, click Create.
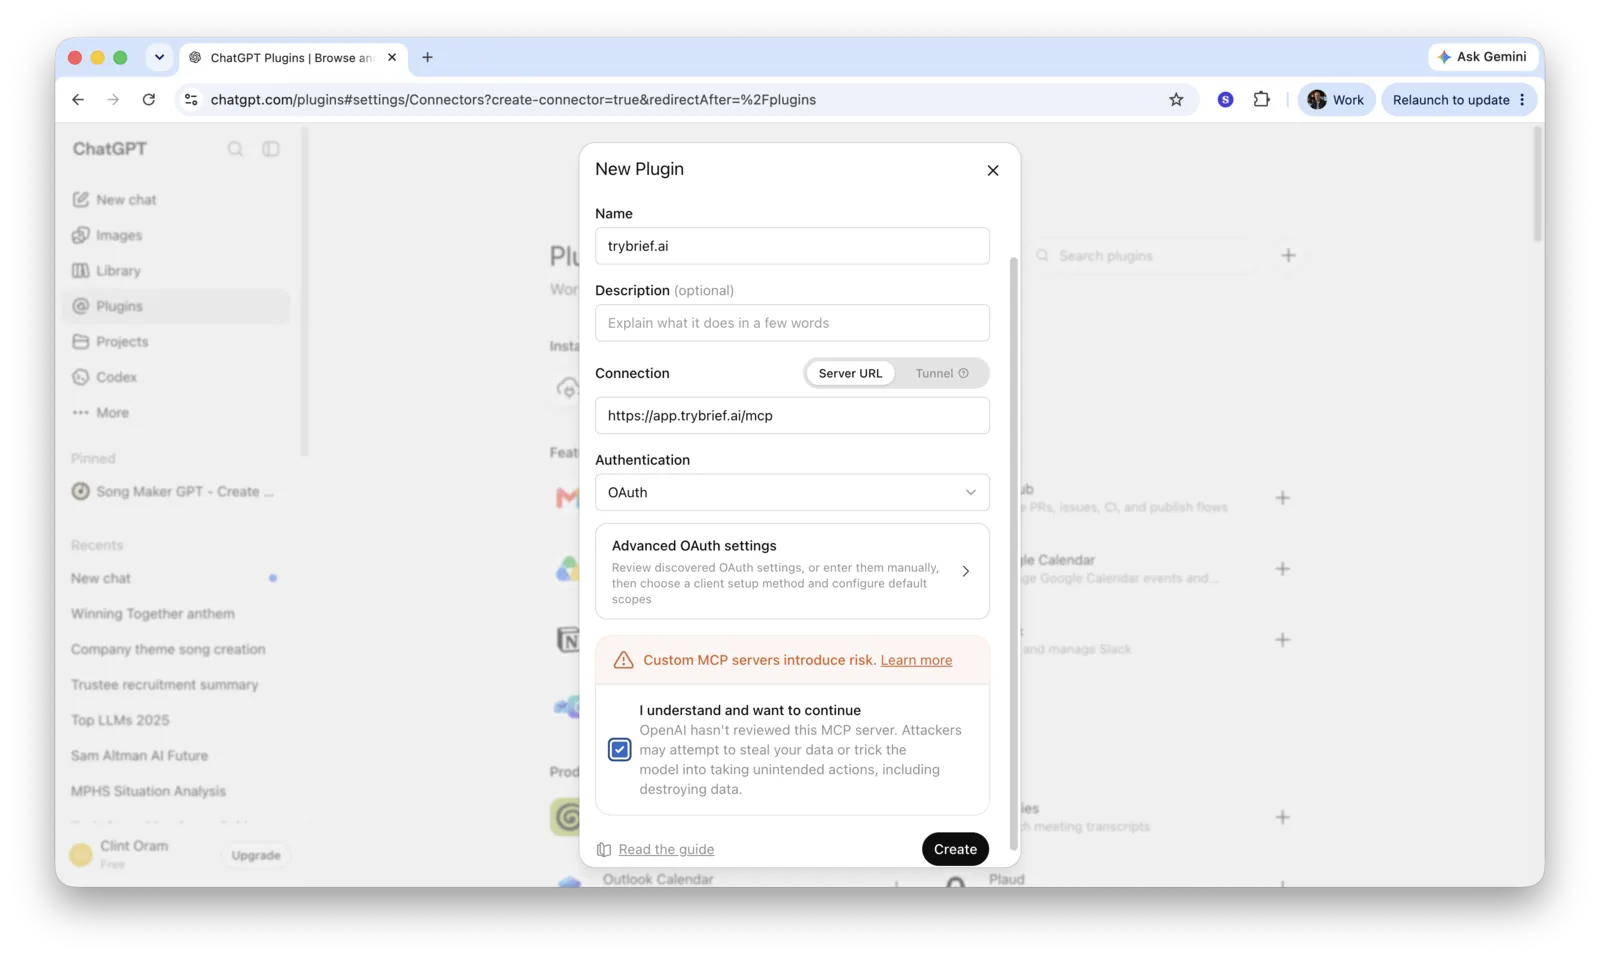
Add the new trybrief.ai MCP plugin in the ChatGPT Web app. - A popup entitled Add trybrief.ai to ChatGPT opens. Click Sign in with trybrief.ai.
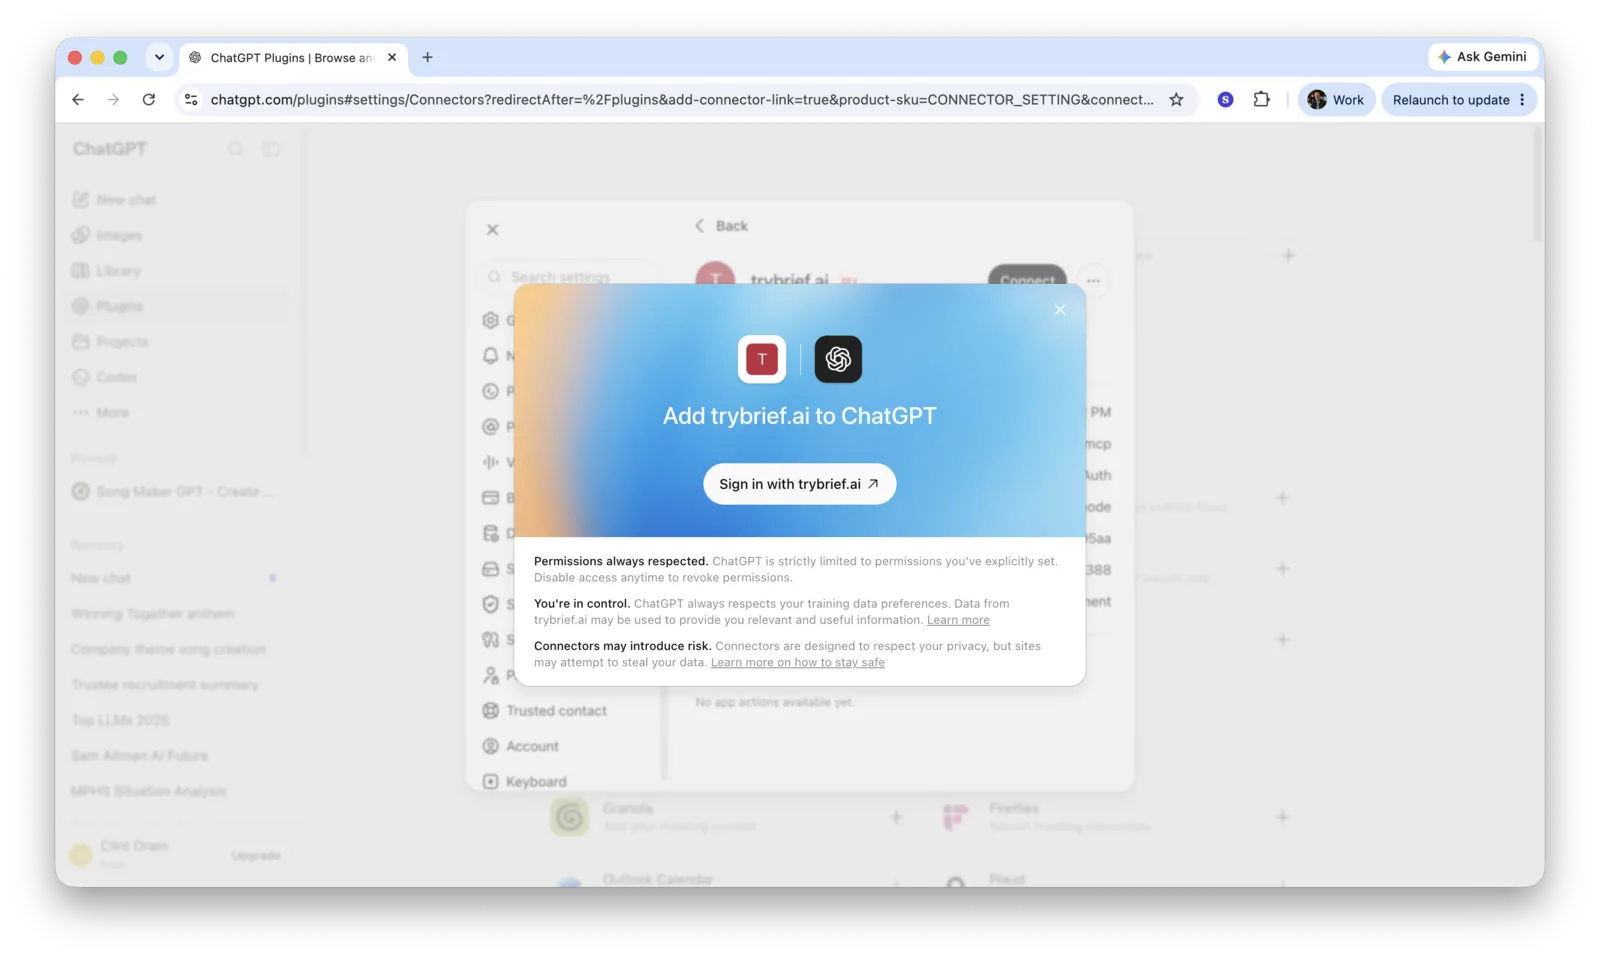
Start the authentication process to your Brief account in the ChatGPT Web app. - The Brief login screens appear. Step through logging into Brief with your Google or Microsoft credentials. The final screen shows the access you are granting for your Brief account.
- Click Approve.
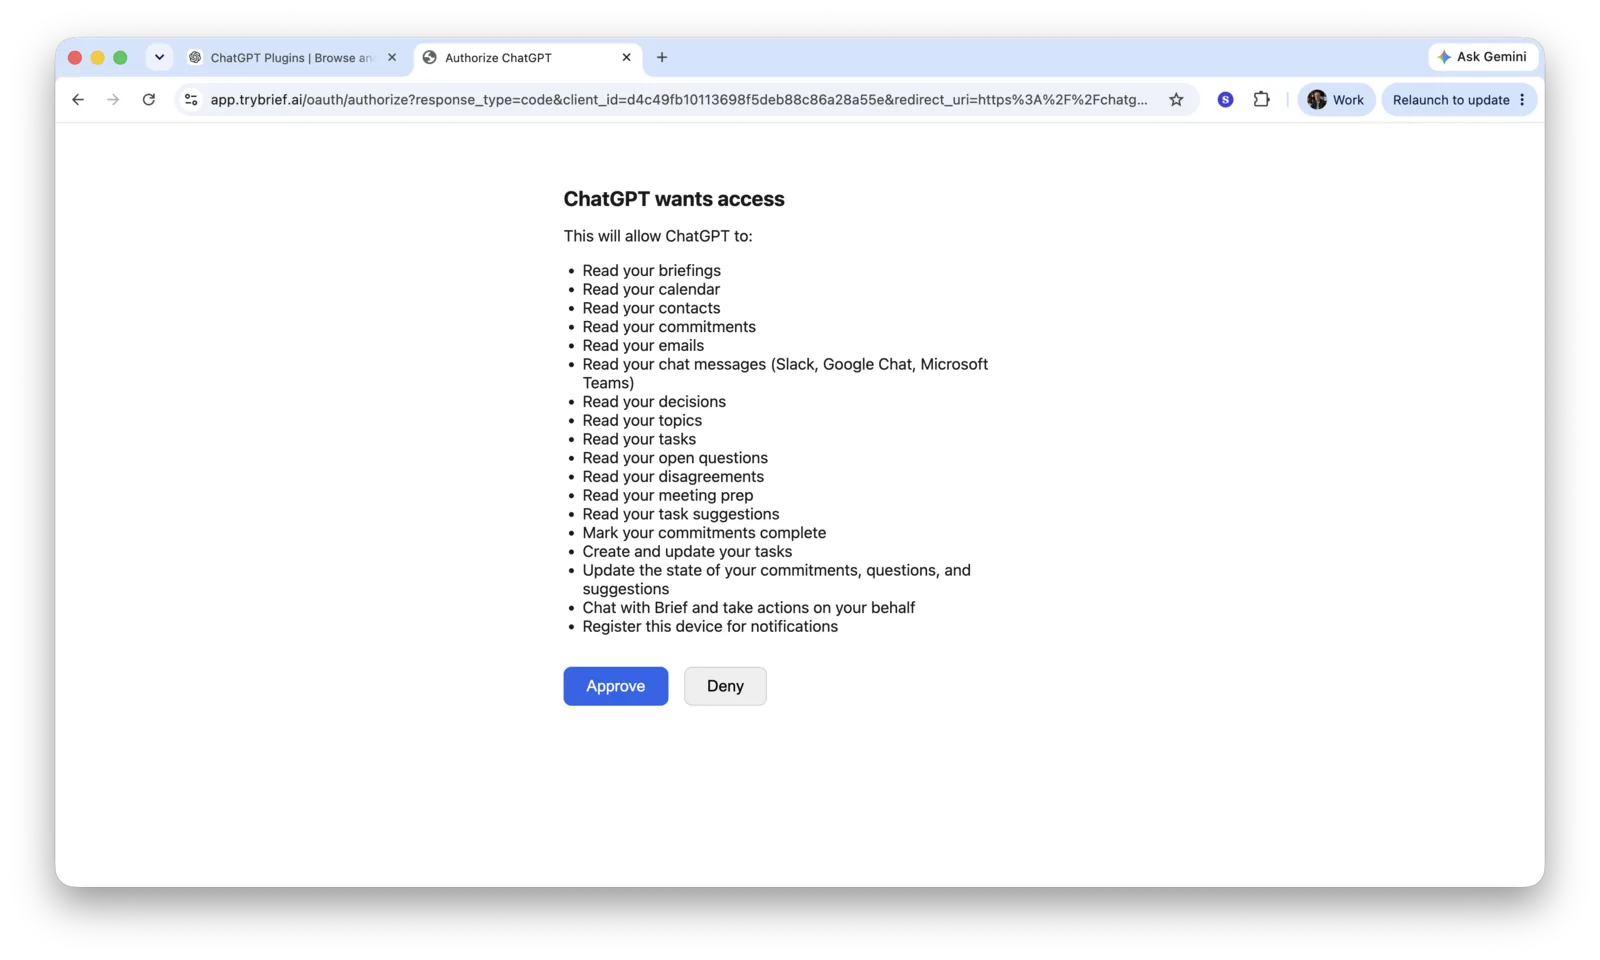
Approve the ChatGPT Web app access to your Brief account. - You are returned to the ChatGPT plugin popup and should see a green alert reading "trybrief.ai is installed."
- Start a new chat session and enter "connect to trybrief.ai MCP".
- The Brief MCP server outputs your daily briefing.
- Follow up with questions like "tell me about my day" or "what should I work on first".
MCP in ChatGPT Desktop app
Follow these steps closely in the desktop app:
- Click your name in the bottom left corner.
- Select Settings → Plugins.
- In the upper right corner, click Add → Add MCP server.
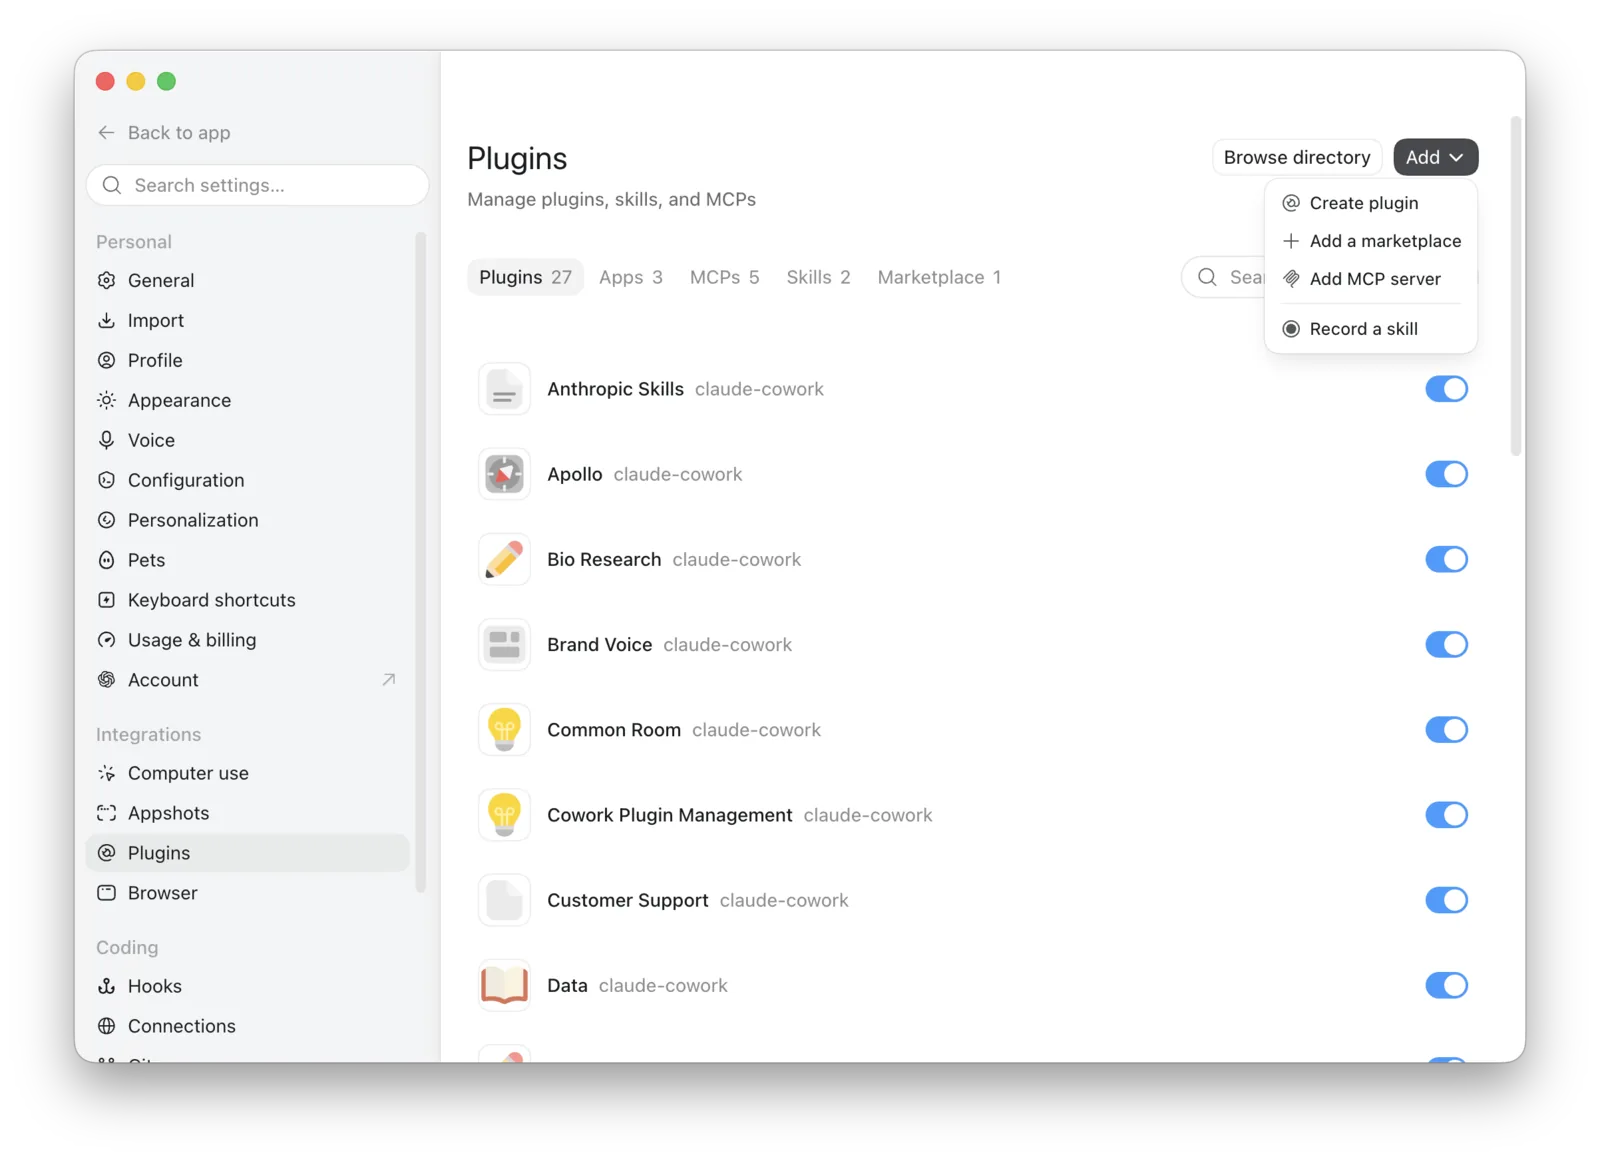
Add an MCP plugin in the System Settings → Plugins configuration screen in the ChatGPT Desktop app. - A screen entitled Connect to a custom MCP opens. It has several fields; you only need two of them.
- On the right side, click Streamable HTTP.
- In the Name field, enter trybrief.ai.
- In the URL field, enter https://app.trybrief.ai/mcp.
- In the bottom right, click Save.
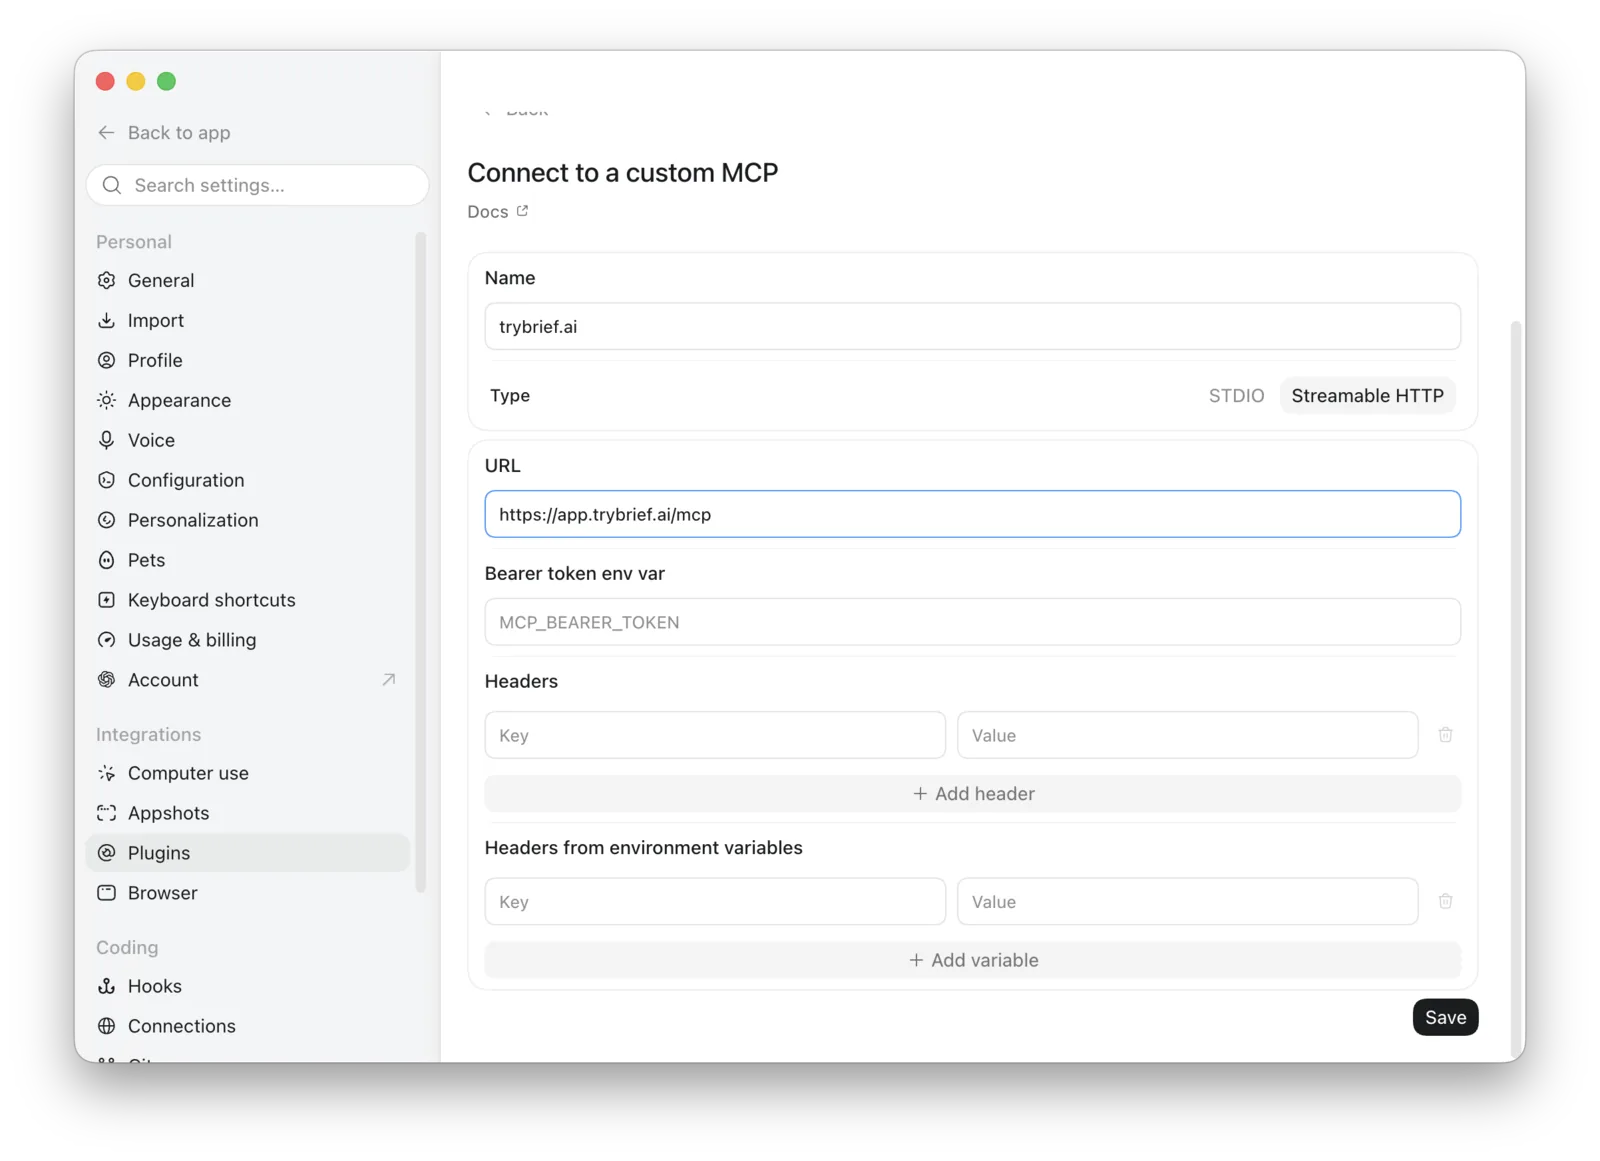
Add the new trybrief.ai MCP plugin in the ChatGPT Desktop app. - The Plugins screen displays. In the middle of the screen, click on the MCPs tab.
- You will see the trybrief.ai server you just configured. Click on the Authenticate button.
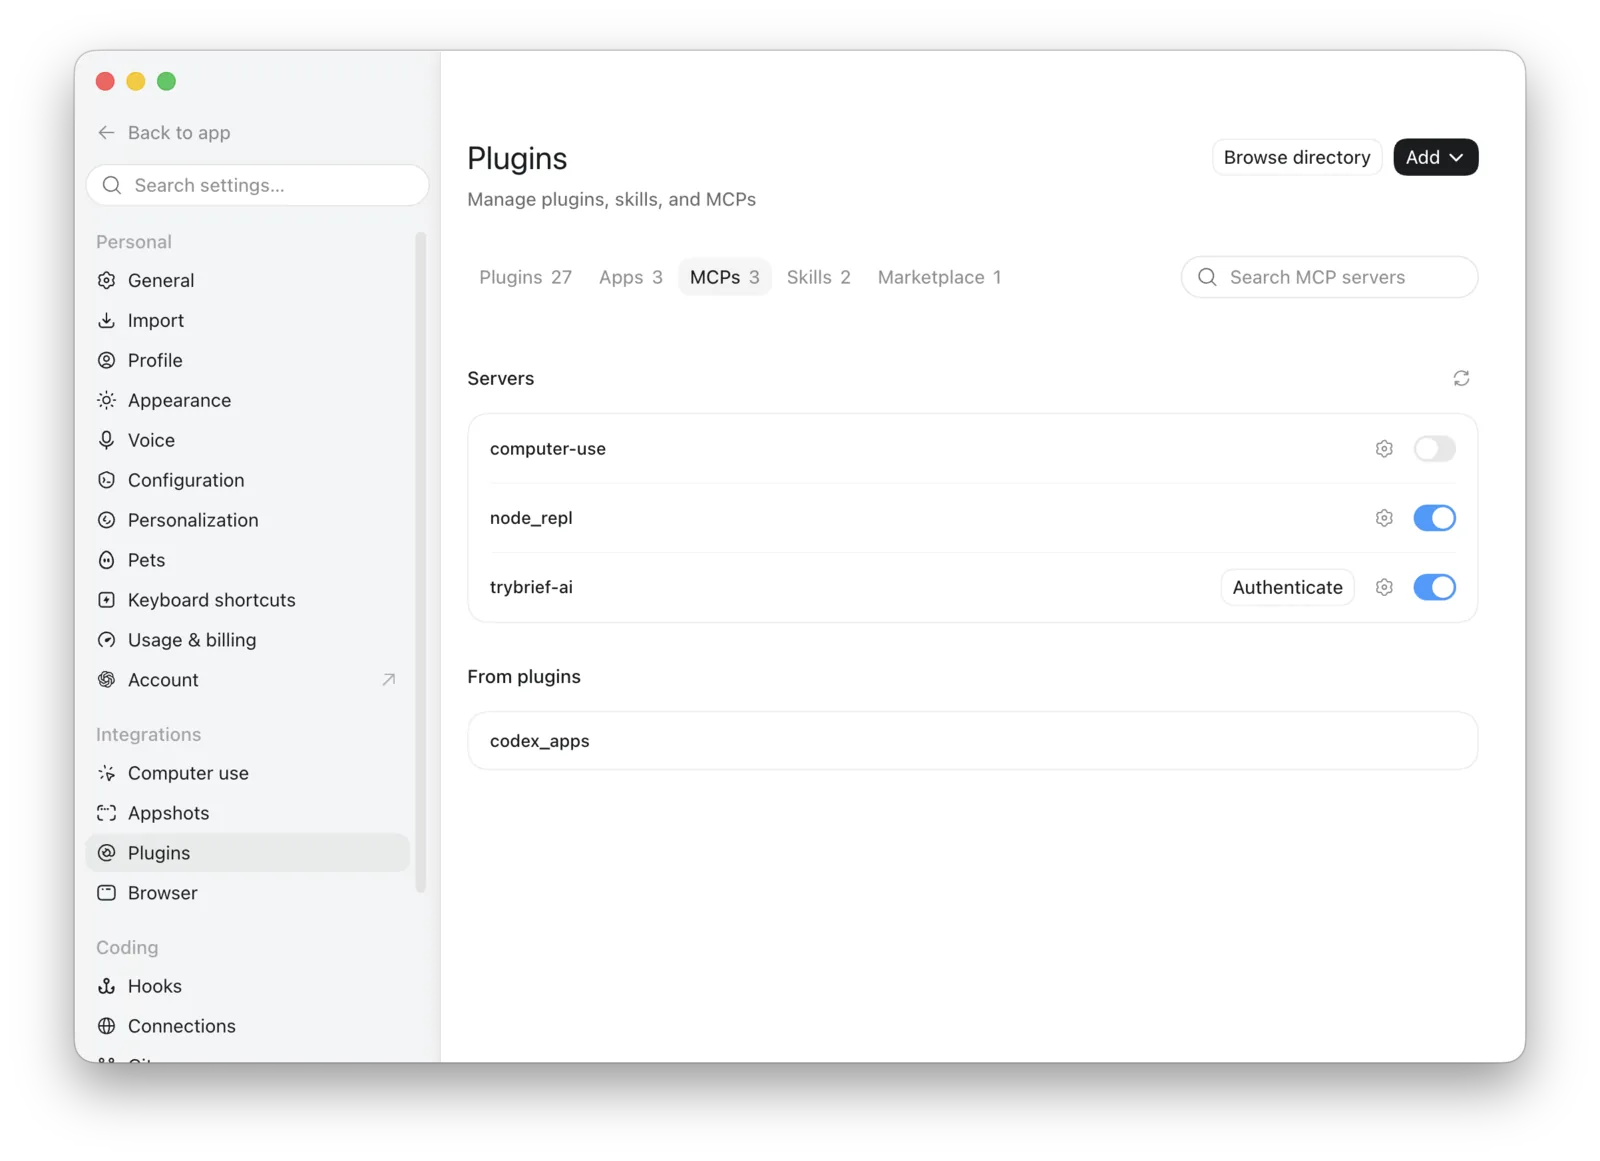
Authenticate the trybrief.ai MCP server in the ChatGPT Desktop app. - The Brief login screens appear. Step through logging into Brief with your Google or Microsoft credentials. The final screen shows the access you are granting for your Brief account.
- In the upper left, click Back to app to close the settings screens and return to the main ChatGPT screen.
- Start a new chat session and enter "connect to trybrief.ai MCP".
- Click Always allow or Allow once.
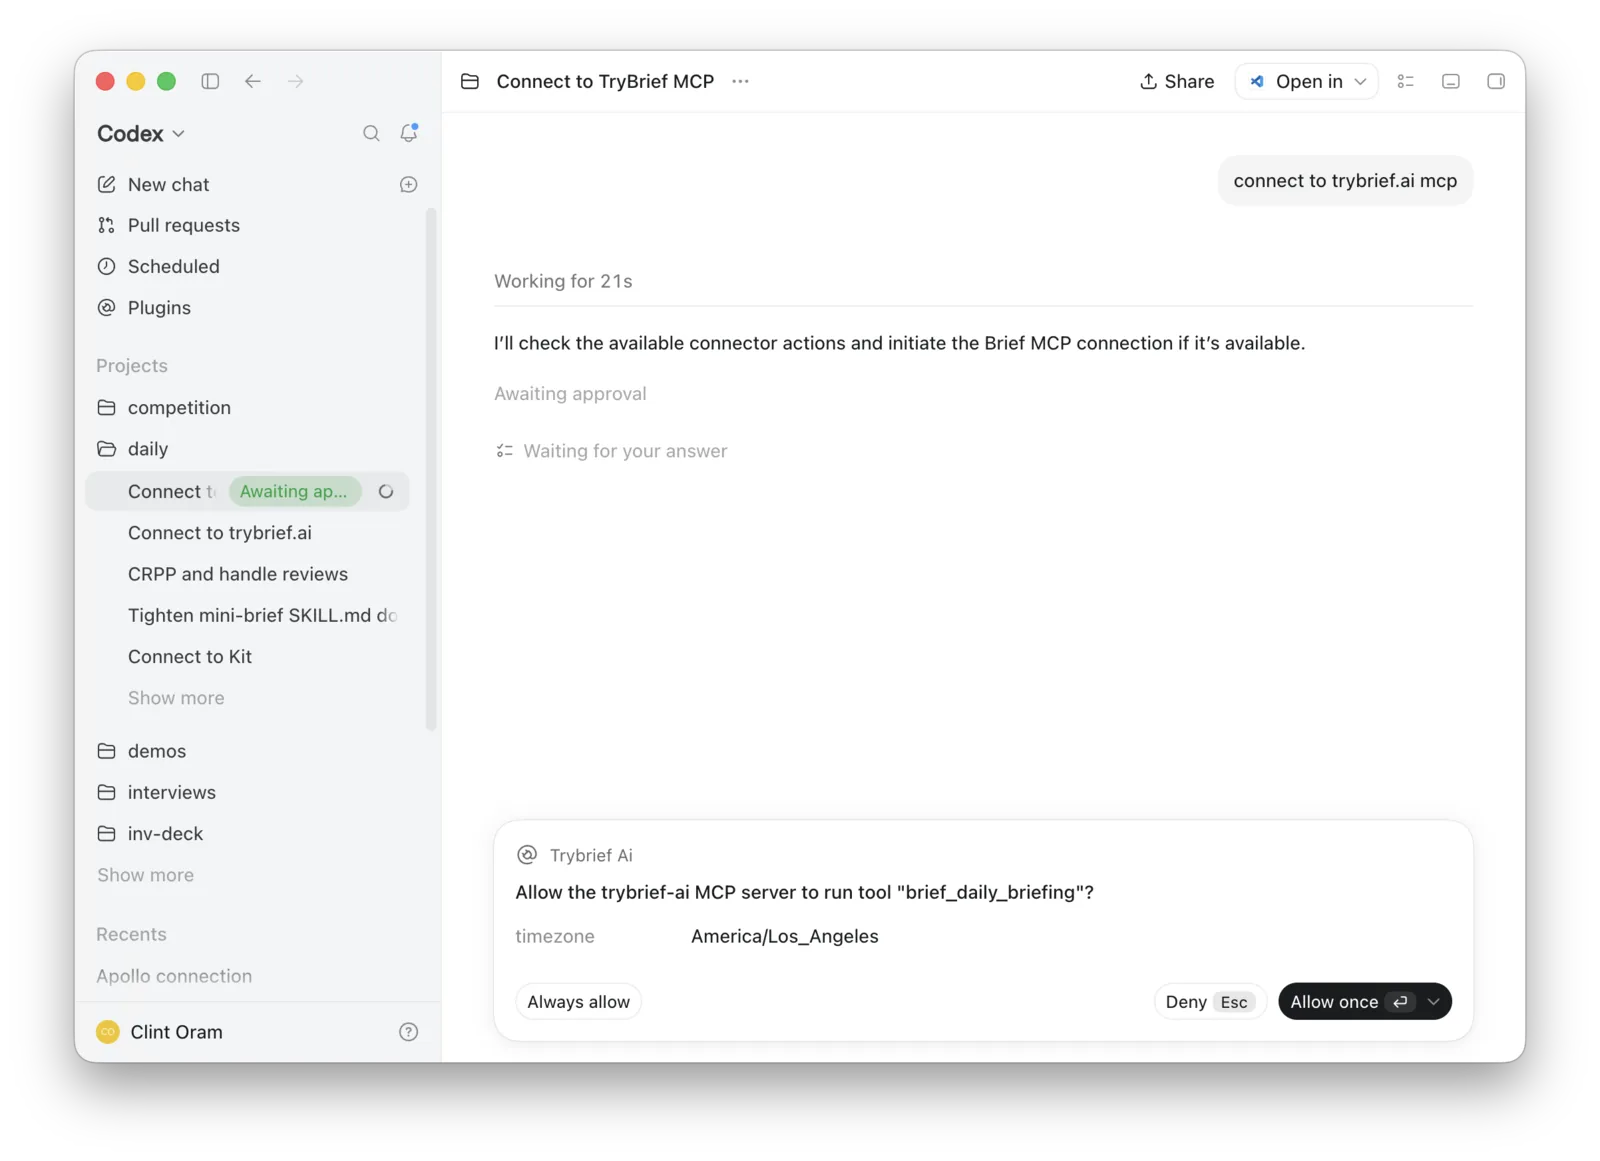
Grant permission for ChatGPT to access Brief through the new trybrief.ai MCP connection in the ChatGPT Desktop app. - The Brief MCP server outputs your daily briefing.
- Follow up with questions like "tell me about my day" or "what should I work on first".
MCP in Claude
Claude uses the same configuration steps in the web app and the desktop app. Claude Code can use any MCP server you configure in either one.
- In the main menu bar, click Customize.
- In the Customize menu bar, click Connectors.
- In the upper right, click Add → Add custom connector. A popup entitled Add custom connector opens.
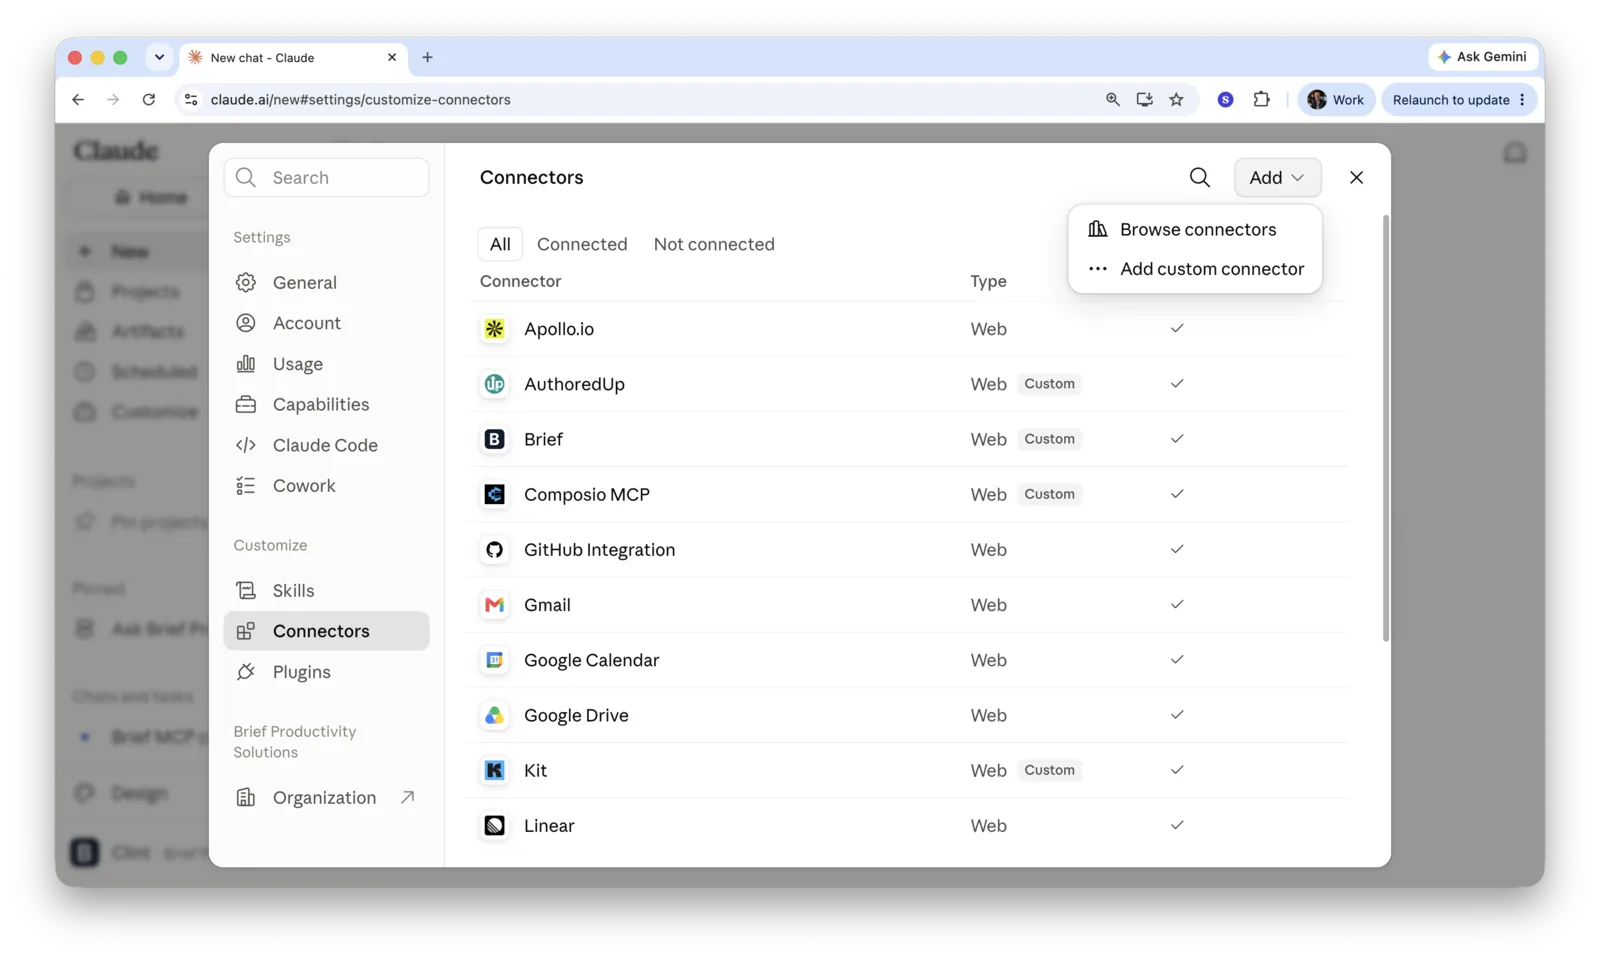
Add a custom MCP connector in Claude. - In the Name field, enter trybrief.ai.
- In the Remote MCP server URL field, enter https://app.trybrief.ai/mcp.
- In the bottom right, click Add.
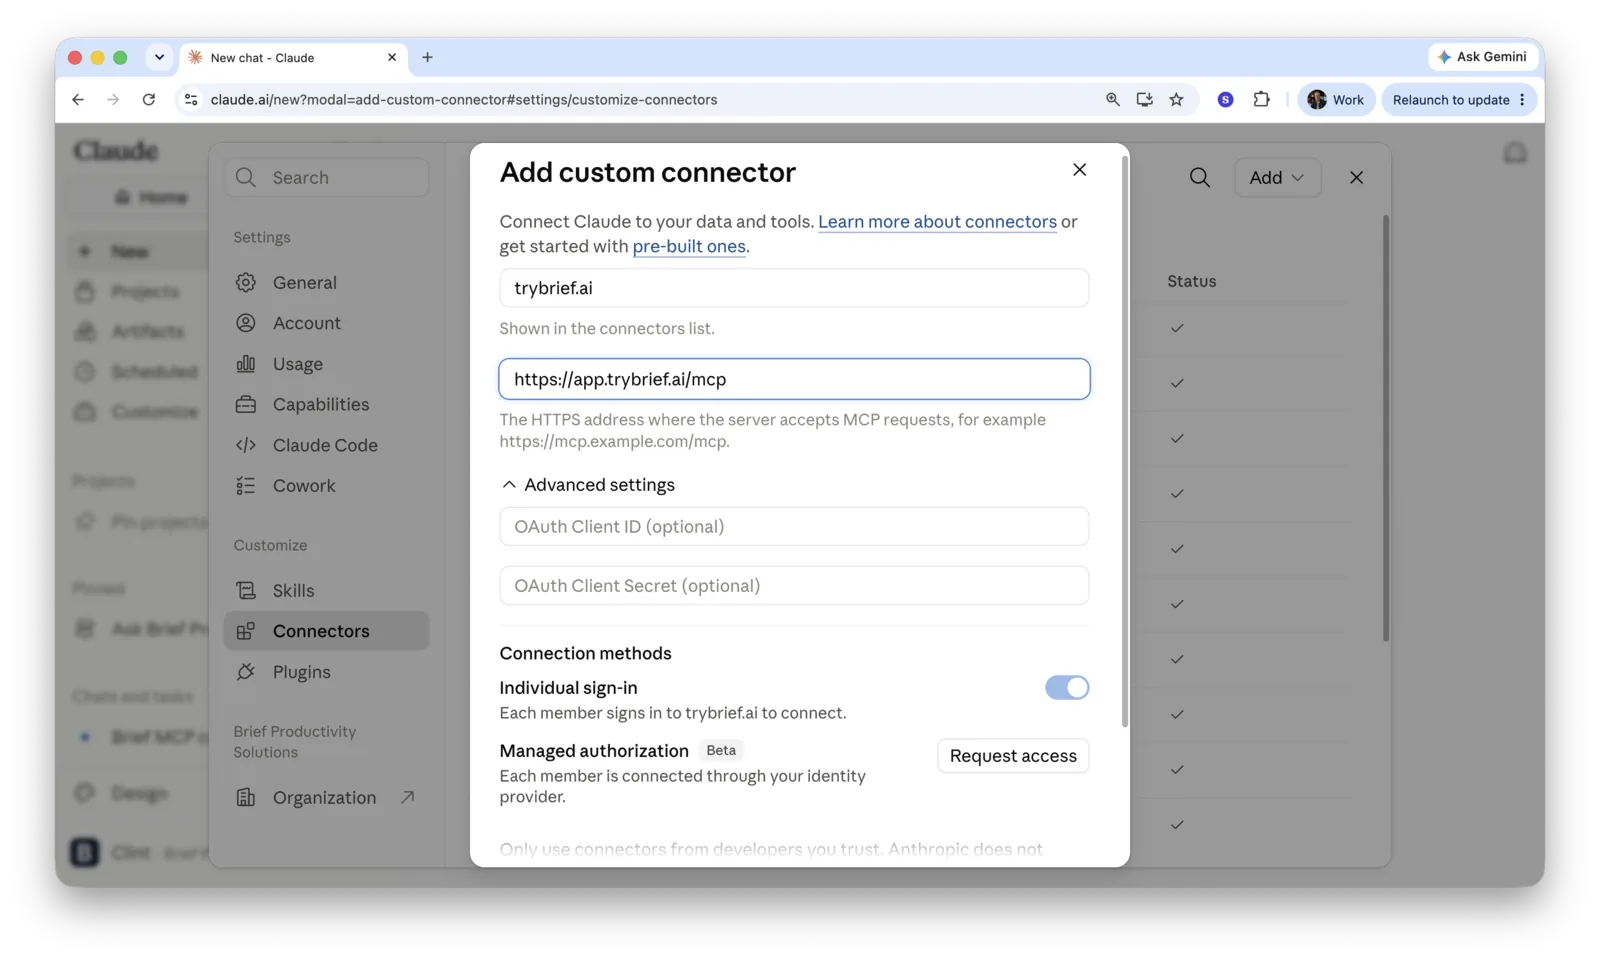
Configure the new trybrief.ai MCP connector in Claude. - If Claude prompts you to sign in, step through the Brief login with your Google or Microsoft credentials. The connector screen shows Disconnect once the connection is live.
- The Brief MCP server is now configured. A connector screen entitled trybrief.ai opens, where you can adjust the security settings if you want to.
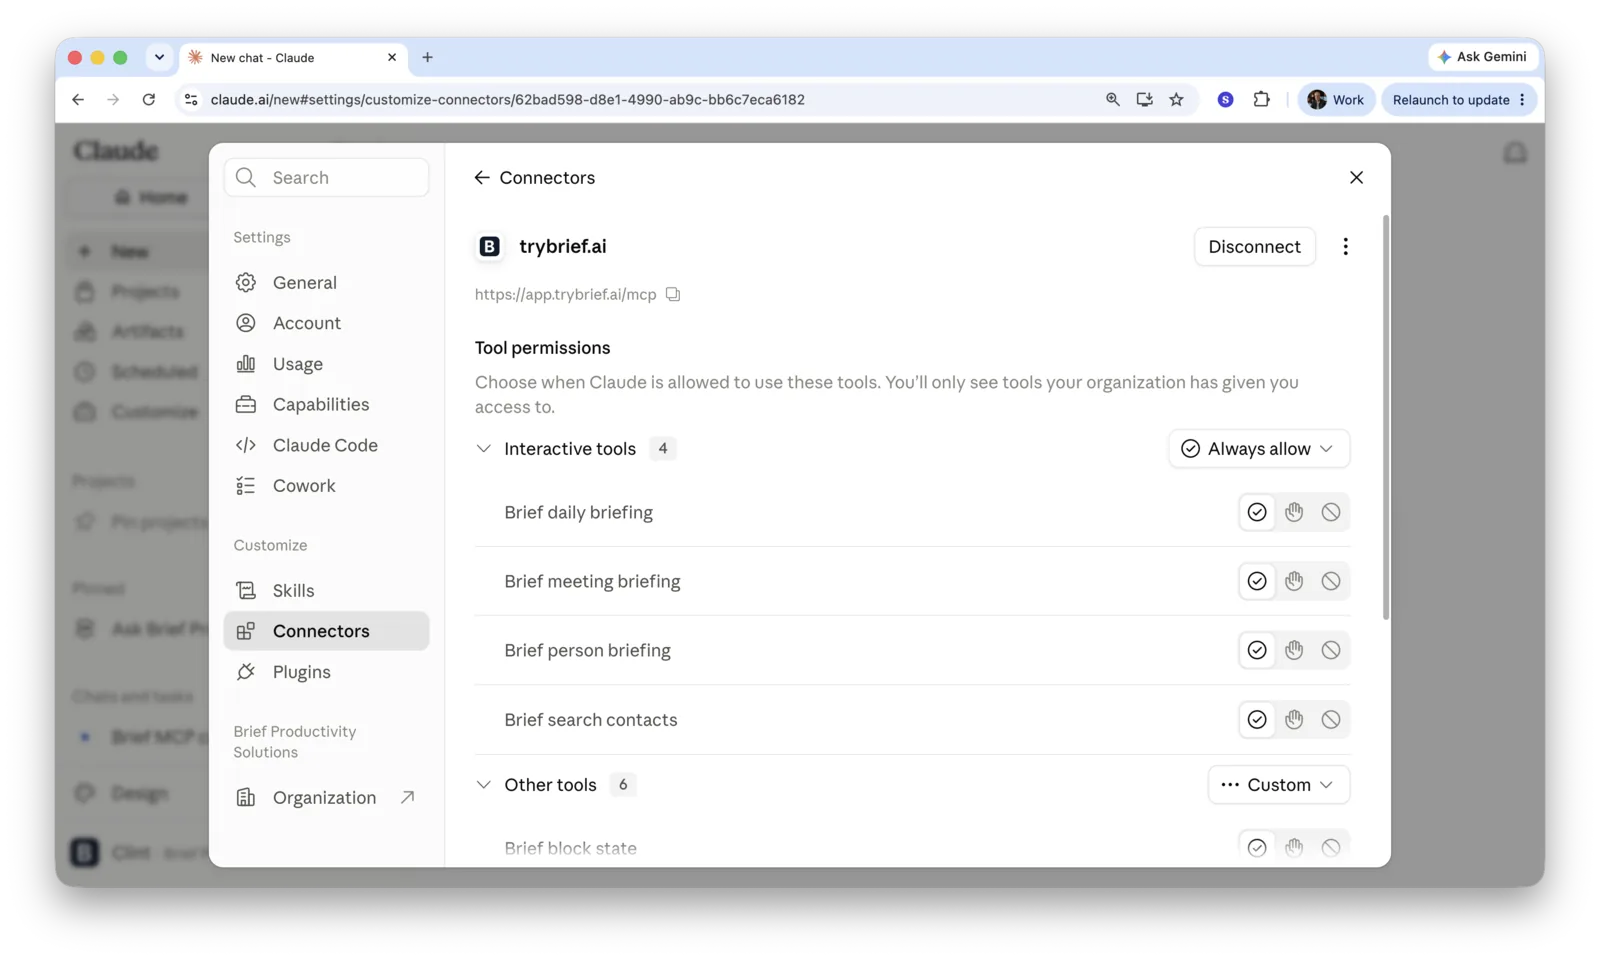
Set default permissions for the new trybrief.ai MCP connector in Claude. - In the upper right, click the X to close the settings screen.
- Start a new chat session and enter "connect to trybrief.ai MCP".
- Click Always allow or Allow once.
- The Brief MCP server outputs your daily briefing.
- Follow up with questions like "tell me about my day" or "what should I work on first".